Sunday, February 17, 2013

Giveaway time!


I wanted to celebrate my new packaging by giving a set of bobbi pins of your choice!
There are four ways to enter, and each way gets you an extra chance at winning.
1.Like my facebook business page here.
2. Share my facebook page by copying and pasting this address: http://www.facebook.com/NicolesThreads
3. Add me to your circle on etsy
4. Include your e-mail with an asterisk (*) to be added to the e-mail list. 

I will pick a winner at random on February 25th at 10pm EST! 


Sunday, January 27, 2013

Packaging


I am so excited to have this winter down time to work on some projects. I am completely switching up my packaging from the handmade, hand-stamped cards.  I designed and ordered (with the help of my good friend Nicole Jayne!) new earring & accessory cards. My old cards were made one-by-one by me. After the holiday rush I am always reevaluating the past year to see how I can make things run more smoothly and efficiently for next year.  At the top of my list was to work on packaging. Branding is so important to a small business like mine, so it was important that these had a handmade feel. I am so excited to get them in my mail box. These cards will even have my website. I can't believe I was sending them out to folks as gifts without that link for so long. 

I also am looking forward to having fabric swatches all in one place for folks to choose from! As more and more folks are looking to me to make them matching jewelry/cuff links for their weddings, it only makes sense to have a swatch catalogue. This will also make my wholesale customers orders much easier! 

On another exciting note, I am taking a small business course and at the end I'll have a business plan (for a new venture - eeeee!) There is another thang or two I've got up my sleeve, but I want to be sure that I know if I am ready to take the next step. I'm also hoping to learn how to get help. There is only so much I can do myself. After running my business alone full time for two years, I find that I need help! Well, it's been a long day of learning excel and playing with photoshop. Off to dreamland... 

Thursday, January 24, 2013

Inspired by this cold...

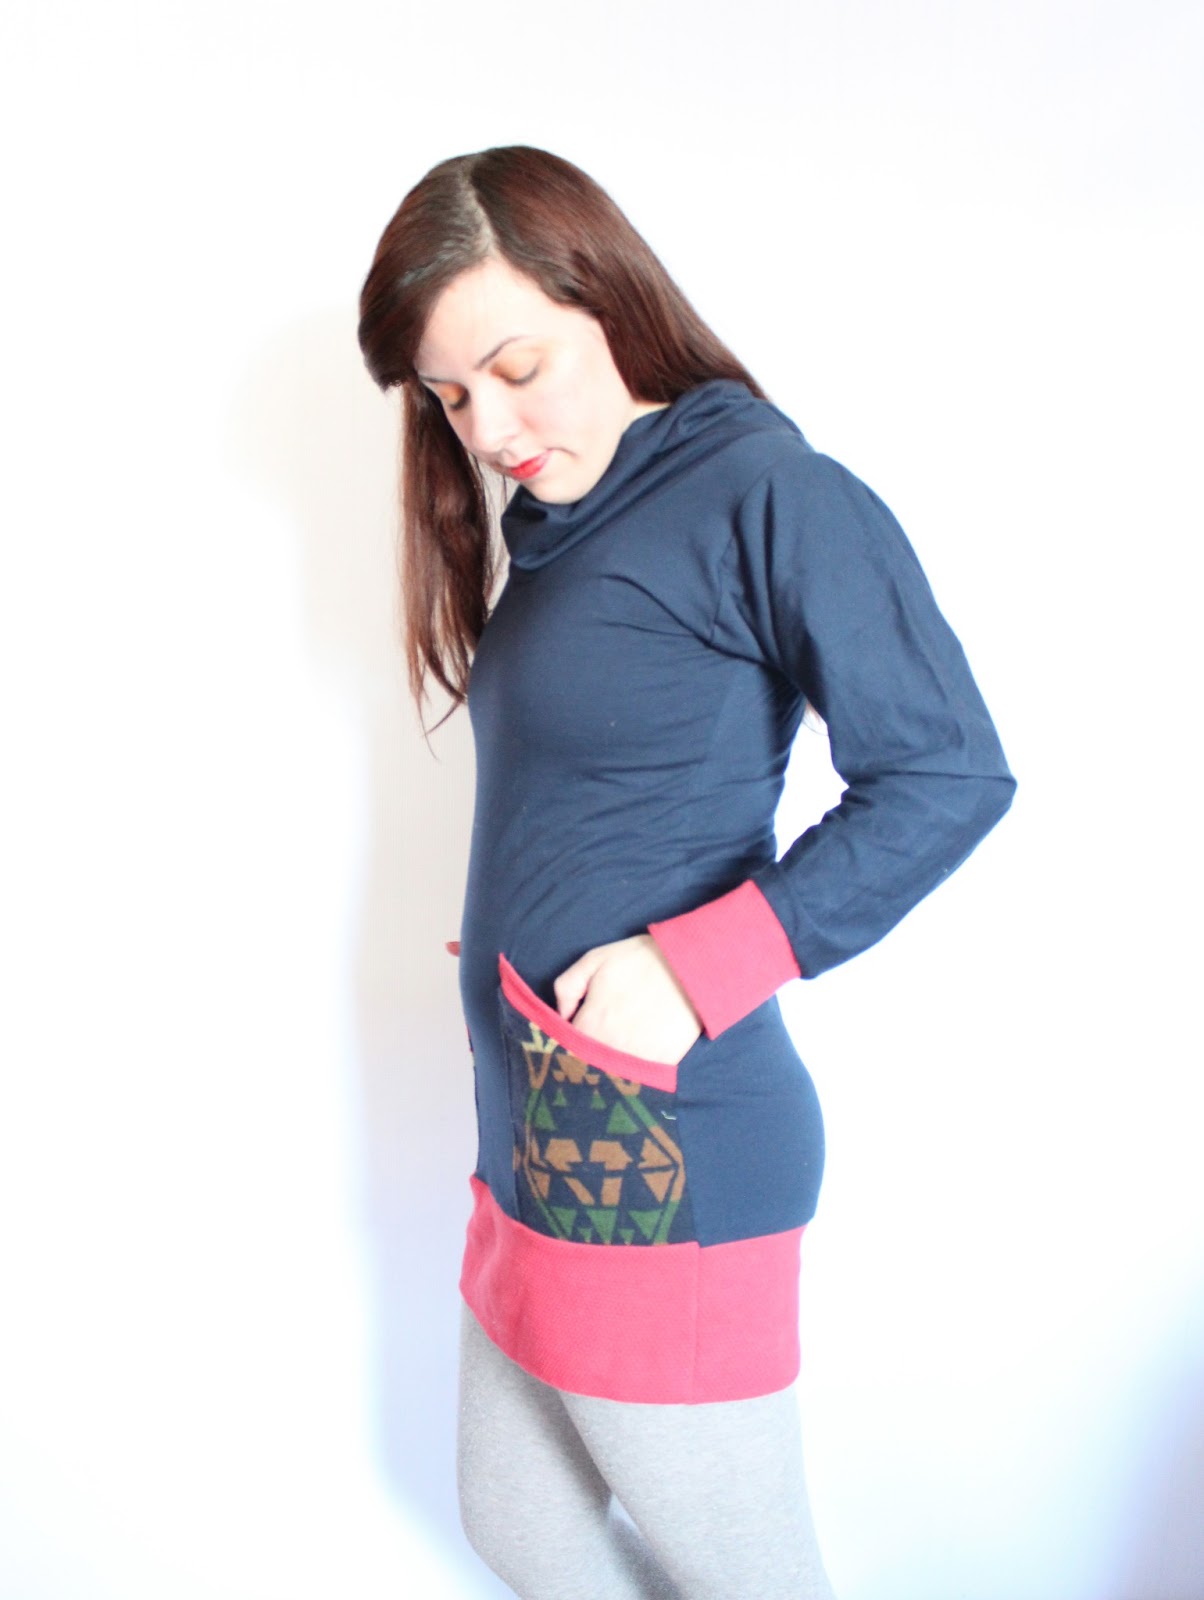
Holy crow! It is cold out there. I was inspired by my friend Erica and this weather to create some new ear warmer headbands. I made three prototypes that I may list on etsy, but I make keep myself. I think these will be around $28. They are made from vintage & reclaimed sweaters!


Wednesday, July 18, 2012

lately..

The Burlington City Arts Market (in conjunction with the Burlington Farmer's Market) is now in full swing. Come by every Saturday from 9-2:30!

This is my new-ish studio space. The other half is shared with the dudes who run Angioplasty media and downstairs is a woodshop! It's at 180 Flynn Ave and I am open to public by appointment only right now. Feel free to e-mail me if you want to come check it out nicoleerincarey@gmail.com 
I'm hoping to have a little soft opening sometime in August and then open to the public for Art Hop!
photo by Erica Fkiaras of love erica photography.
Also! I took part in Where Designs/AngioPlasty/MSR fashion show styled by sound (Barbacoa played!) at Main Street Landing. Don't the girls look beautiful? Most of these dresses are available for sale in my etsy shop: http://nicolecarey.etsy.com. I had a ton of fun! 

These are one of the popular items this season, the color block dress! Modeled here by Jennifer Kahn  of Jennifer Kahn Jewelry (thanks Jen!) and myself. The orange and pink combo has been a hit at the market! I have enough fabric to make a few more! They are also available on my etsy site as made to order in your size here

Also, I've been really into styling photo shoots with my dog and sunglasses. 
If you wanna see more photos of the stuff I make and lots of pictures of my dog, follow me on instagram @ nicolesthreads! 


Tuesday, April 10, 2012

Etsy Workshop

Today I had the opportunity to give an Etsy workshop, to share tips with my fellow Vermonters in hopes of having some of them better their internet selling experience. I spoke in public in front of about 20 people. I haven't done something of the like since high school. Easy it is to hide behind this computer and talk but having all of your idiosyncrasies out there for everyone to see - well that is something! I practiced by videotaping myself. Um.. do I roll my eyes a lot? I mean nothing by it! I didn't even know I did it until yesterday. Do I say like, like way too much? Yeah. Well, like.. um... yeah.. woops. It's easy to edit and re-edit all of my internet doings but having no filter was a rather new experience for me. I play music (not as much as I used to) and the part that I hated most about playing out was having to say things in between songs. What to say? I don't have anything to say. Well it turns out that I do!

 After writing a power point, making lots of notes and practicing I have come up with some tips that I'd like to share.  Lots and lots of questions were asked and hopefully answered. While practicing, I worried that I wouldn't fill my time slot with all of the information. Quite to the contrary, time was running out and lots of questions seemed to remain. I hope that my workshop gave you a needed push in the right direction.

Here are some notes from the presentation for those of you who weren't able to make it or for those that would like a re-cap.


Beginnings.

What do you want to sell? 

Choosing a shop name. Brainstorm with friends. Write a list of descriptive words. Pick out a shop name that is catchy and not in use. 

Decorating. Develop a brand or logo and use this for your shop banner.  Create an avatar with a photo of an item or a picture of yourself. I would recommend not having your avatar be of an item that has been sold and cannot be reproduced.

Stocking your shop. The more, the better. But keep it organized and in sections so that it is easy for your customer to navigate your shop. 

Photos. 

Use natural light whenever possible. Cloudy days or shade is best. Direct sun can create unwanted shadows and glares. 

Avoid flashes.

Use live models. Everyone likes to see what something will look like on a real person. If a live model doesn't apply, try some other sort of props but be sure that it is absolutely clear what is for sale in the photo and reiterate that in your items description. 

Use all five photo spots that Etsy offers. 


Pricing

What is your cost of materials? 

What will you pay yourself per hour/day/piece/etc.? 

Do not undervalue your work. People come to etsy to buy unique and handmade items. Don't compare your prices to factory mass produced items because they are not the same. 

Some quick calculations for pricing are: 

Cost of materials*2+labor= Wholesale price
Wholesale price*2= Retail price

Listing an item

This link provides step by step instructions on listing an item. http://www.etsy.com/help/article/187 

Bringing potential shoppers to your site

-Exhaust all social media outlets (Facebook, Twitter, Pinterest, Tumblr, etc.) 

-Blogging.

-Join a treasury or other etsy team

-Etsy search ads. These haven't worked much for me but try it out! 

-Coupon codes. Offer coupon codes for a repeat sale, to your facebook, twitter or other social media outlets. 

Customer Service

Etsy Conversations & Internet Etiquette It can be hard to infer that you are always being friendly on the internet. When in doubt, just use lots of !, smiley faces and positive words. 

Keeping in touch after a purchase. Let your buyer know when you shipped your item out, or if it is something that is made to order, keep them up to date on how long until they should expect it. 

Thank you. Include a thank you note with each order. 

Angry customers? Take a chill pill before responding to them. Wait until you are calm enough to be nice, even if they are a jerk. 

Shop policies. These are important. These dictate whether you take returns and your conditions, etc. It is also a good section to put whether you insure your packages, provide delivery confirmation, etc. 


I hope the workshop/blog post was helpful and I wish you the best of luck in your etsy adventure! 

Wednesday, March 14, 2012

my first quilt

I made my first quilt! Can you believe it took me this long to actually do it? I have been saying for years that I would make one.  For every winter since I learned to sew in fact.  The hardest part about it was starting. I am not one to follow a pattern when it comes to this sort of thing. I am too inspired by lots of colors and patterns mixed together to create a bright and cheery piece. 

I have used lots of patchwork and quilting techniques in my clothing. But there are so many steps to completing a quilt that the project was still a bit foreign. I hadn't ever made my own bias tape, had no idea how to begin with mitered corn haven't had any experience with quilt batting, or which kind to buy, and I wasn't certain whether my machine could handle topstiching such a big piece.

 I thank the countless videos on youtube for teaching me how to make bias tape, attach it, perfect mitered corners, and how to top stitch on a home machine. I practiced all of the techniques that I would eventually use for the quilt by making hot pads and pot holders. I love how they came out. I lined them with two layers of either felt or fleece. I used mine a few times and didn't burn my hands but I still want to test them out a bit more before I list them in the etsy shop! I also learned that there is an insulated liner that I can buy for if I make them in the future. Who knew? 
I quickly realized that if I wanted to make a regular sized quilt for my bed I would have to send it out to be top stitched. The little bit of arm space on a regular sewing machine isn't wide enough to fit the bulk of a regular sized quilt through. I decided to make a lap quilt or baby blanket (but I'm not a baby and it's for me so it's a lap quilt).  It was still kind of tough and annoying to top stitch especially when I got to the middle. If I make bigger quilts I will most likely have to hire someone else to top stitch or see if there is a place where I could rent a long arm machine. 


I used some of my favorite fabrics that I have been saving for ages for this project. Each fabric brings back a memory of where I got it, or if someone gave it to me. Some are from my old clothing or a shirt from my Mom.  I try to find fabric when I go on trips to remember them by. This quilt was heavily influenced by the Quilting Women of Gee's Bend. One of my biggest regrets was missing their exhibit at the Philadelphia Museum of Art.

I am already daydreaming up new ideas for quilts. I think I will try a few more small ones before I move on to the big guys!